
Are you thinking of revamping your living space with a touch of timeless elegance? Wood wall paneling could be the answer you’ve been looking for! Wood paneling not only adds warmth and character to a room but also provides an excellent way to cover up imperfect walls or create a focal point. It is a decorative and functional covering for interior walls made from various types of wood. It is an architectural element that has been used for centuries to enhance the appearance of interiors, providing warmth, texture, and character to a room. Wood wall paneling comes in a variety of styles, finishes, and patterns, making it a versatile choice for different design aesthetics. We’ll guide you through the step-by-step process of installing wood wall paneling, allowing you to transform your space into a cozy sanctuary that exudes sophistication.
Post your Requirement
Enquire Now for Cladding & Facades
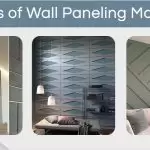
Types of Wood Wall Paneling:
-
Traditional Tongue and Groove:
This type of paneling features interlocking edges, with one side having a groove and the other a protruding tongue. The panels fit snugly together, creating a seamless and classic look.
-
Beadboard:
Beadboard paneling consists of narrow, vertical planks with a ridge, or bead, running along the edges. It’s often associated with cottage or coastal styles.
-
Shiplap:
Shiplap paneling has overlapping, horizontal boards with a rabbeted edge, creating a distinctive shadow line. It’s commonly used in farmhouse and rustic designs.
-
Reclaimed Wood:
Panels made from reclaimed wood have a unique charm, as they come from salvaged materials with a rich history. This type of paneling adds character and an eco-friendly touch to the space.
-
Flat Panels:
Flat wood panels are simple and modern, offering a clean and contemporary appearance. They are often used to achieve a minimalist look.
Advantages of Wood Wall Paneling:
-
Aesthetic Appeal:
Wood paneling adds a natural and elegant touch to any interior, creating a warm and inviting atmosphere.
-
Insulation and Acoustics:
Wood has natural insulating properties, which can help regulate the temperature of a room. Additionally, wood panels can improve acoustics by reducing sound reverberation.
-
Hide Imperfections:
Paneling can cover up imperfections in the walls, such as cracks or uneven surfaces, providing a smooth and polished finish.
-
Durability:
High-quality wood paneling is durable and long-lasting, making it a worthwhile investment for your home.
-
Easy Maintenance:
Wood panels are relatively easy to clean and maintain, especially when treated with a protective finish.
-
Versatility:
Wood wall paneling comes in various designs and finishes, allowing you to choose the style that best compliments your interior decor.
Disadvantages of Wood Wall Panelling
- The natural moisture of the wood starts to lose with time and particularly in air-conditioned rooms.
- It is not waterproof. Panels cannot prevent from rotting when they are in contact with water.
- It requires a lot of maintenance from time to time.
Enquire Now for Cladding & Facades
Steps for Installation
Step 1. Gather Your Tools and Materials:
Before diving into the installation process, ensure you have the necessary tools and materials ready. You’ll require wood panels of your choice, measuring tape, a level, a stud finder, Nails or adhesive (depending on your preferred installation method), a hammer or nail gun, a miter saw or circular saw (for cutting panels to size), Sandpaper (for smoothing rough edges), Paint or stain (optional, for finishing).
Step 2: Measure and Plan:
Accurate measurements are crucial for a successful installation. Measure the height and width of the wall you intend to panel, taking note of any obstacles like electrical outlets or switches. Plan the layout of the panels, considering factors like panel orientation, starting point, and pattern (if applicable).
Step 3: Locate and Mark Studs:
Using a stud finder, locate and mark the positions of wall studs. It’s essential to fasten the wood panels securely to the studs for a sturdy installation.
Step 4: Cut Panels to Size:
If your wood panels aren’t already pre-cut to fit your wall’s dimensions, use a miter saw or circular saw to trim them accordingly. Double-check your measurements, and take your time to achieve precise cuts.
Step 5: Prepare the Wall and Panels:
Inspect the wall for any imperfections and repair or smooth them before installation. Sand the edges of the wood panels to ensure a seamless fit and to remove any splinters or rough spots.
Step 6: Install the First Panel:
Begin at the bottom corner of the wall and work your way up. Apply adhesive or use nails to fasten the first panel in place. Ensure it aligns with both the floor and adjacent walls, using a level to maintain straightness.
Step 7: Continue Installing Panels:
Add subsequent panels one by one, either using nails or adhesive, depending on your preference. Remember to leave a small gap between each panel to account for the natural expansion and contraction of the wood due to humidity changes.
Step 8: Trim and Adjust as Necessary:
Inevitably, you’ll encounter areas where the panels need to fit around obstacles like outlets or corners. Use your saw to carefully cut and adjust the panels for a perfect fit.
Step 9: Complete the Top Row:
When you reach the top row of panels, you may need to trim them to fit the remaining space. Ensure the last row maintains a consistent width to create a polished look.
Step 10: Finishing Touches:
If you desire a different color or finish for your wood panels, now is the time to apply paint or stain. Choose a product that enhances the natural beauty of the wood while complementing your interior decor.
Conclusion:
Installing wood wall paneling is a rewarding project that instantly elevates the ambiance of any room. Whether you’re aiming for a rustic, classic, or modern feel, wood paneling offers unmatched versatility. Armed with the right tools, a bit of patience, and a creative vision, you can transform your living space into a stunning haven of style and sophistication. So, don’t wait any longer—unleash your inner designer and make your space come alive with the beauty of wood wall paneling!


Post A Comment