Solar energy is free. Electricity produced from other sources has a major cost attatched to it. Solar water pumps or any other solar gadget requires a basic equipment, which can be expensive in the beginning when you buy and assemble, but after that the costs are almost nil. Just some basic regular maintenance is needed.
Post your Requirement
The solar water pump can be used to provide water on agricultural land or for supplying water to housing societies in cities. According to your need you can use these pumps in various ways. The solar pump system is a photovoltaic system and can last up to 20 years.
Let’s take a look at agriculture in India.
Here, a common farmer needs Rs50000 to set up an electrical connection on his farm. Then he has to buy a pump worth 5000-35000 to pump water for this field. The main problem here is that the maintenance of power lines is not good and there is high variation in the voltage supplied. This makes the pumps, coil and windings get damaged. This can mean less efficiency or even absolute damage to the pump. Farms with batteries and inverters also suffer losses due to voltage fluctuation. The money is needed for a new pump, inverter and batteries. Irregular power distribution, power shortage also hampers production. E.g- A cucumber crop needing water regularly every single day. If it doesen’t get water due to lack of power supply it leads to weight loss in cucumber production. Crops in India are sold by weight so reduced weight would mean reduced income. So a solar water pump would be a big help.
Also if the water is regular then the farmer can take two more crops besides the rabi and kharif crop. For big farms and green houses a sprinkler system can be set up. For poultry farms cool sheds can be created and drinking water could be provided to the birds.
It can be used in buildings and societies in cities for drinking water and sanitary use.
II Choosing parts of your system
Choosing parts of your system depends on your purpose and application.
Main factors involved in choosing parts are: Solar Output, Cable size, speed, flow rate, efficiency and pipe: Length, diameter.
Parts mainly are:
1. Anti-Corrosion paint to prevent rusting of pipes.
2. Beams of varying sizes.
3. C-channels
4. Solar Panels
5. Solar pump system controller
6. Solar Pump
7. Cables
8. Circuit Breakers
9. Concrete/Cement mixer
The tools used are welding machines and welding rods screwdriver, drills, wire cutters, digital multimeter, spirit level bottle.
You don’t require many skills. You should have a basic understanding of electrical wiring, electronics, structural design, and basic welding.
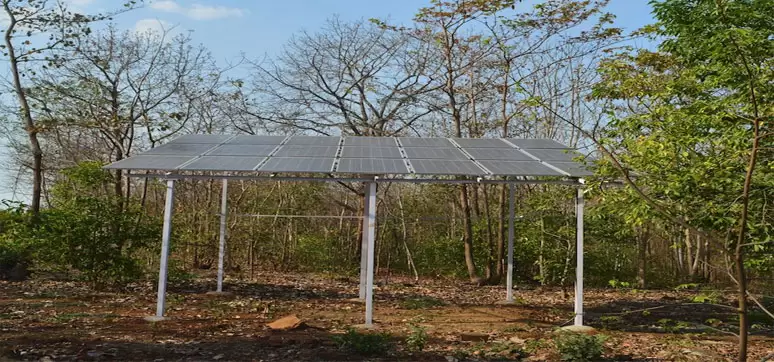
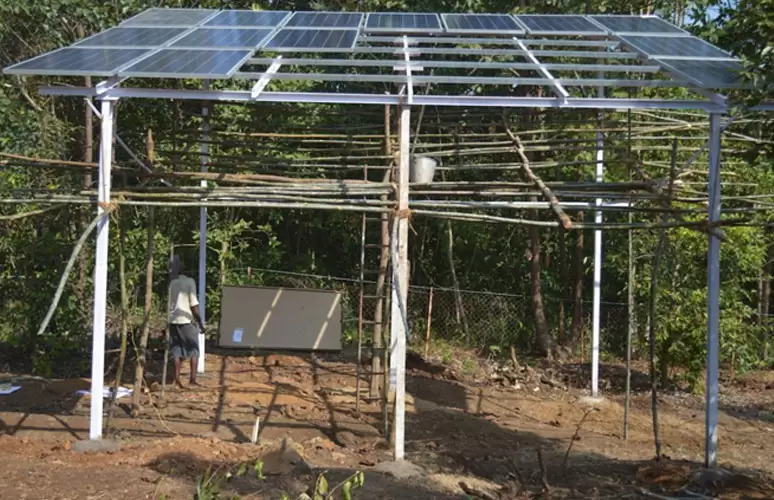
You need a solar panel stand which is basically a metal framework to support the solar panels. It consists of I-beam and C-channels that support the panels and keep them at the required angle.
The solar angle is very very important. You need to put the panels at some optimum angle to get the maximum efficiency from the solar system. This optimum angle varies throughout the year, depending on the seasons and your location and there is a calculator available which shows the difference in the sun’s height on a month-month basis. It’s called a solar panel angle calculator.
Anti-corrosion paint on the beams and channels is most important because the whole structure is in the open, open to rain and sunshine so this will tend to rust.
The steps involved in the creation of the structure are:
I-beam placement and foundation.
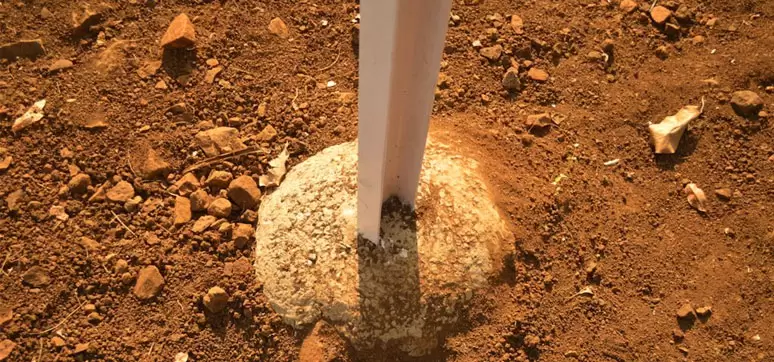
You dig a hole 2 ft*2ft*2ft and fill it with concrete. Then fit in the beam and pour cement to fix the beam in the hole.
Add the lower C-channel. Attach a C channel to the two I-beams. Use stainless steel nuts and bolts.
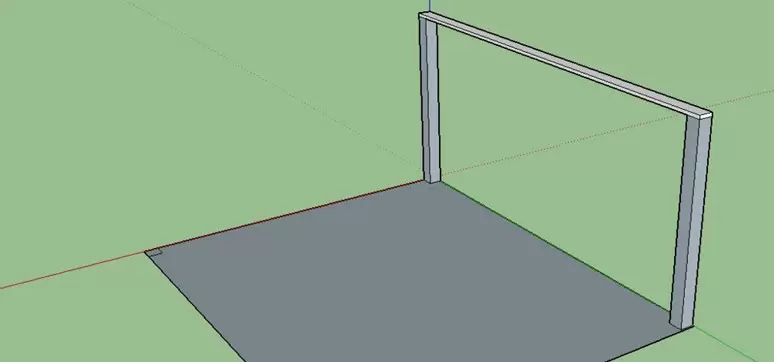
Add 7ft I-beams and top C-channels. Attach these beams and channels to the ones before placed as shown in the picture. Then add the remaining I-beams, then add the other C-channels.
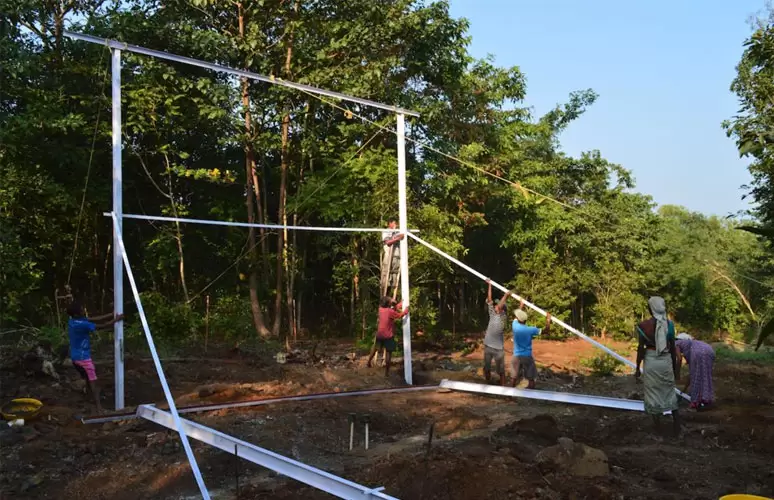
Then add the inclined C-channels. This step involves welding. The structure now will look somewhat like this.
Now add the solar panels. 21 solar panels would be needed.
Power 280 Watts. Voltage 35 Volts.
L*b*h=1960 * 910 * 42 (mm)
Then you connect the solar panel as shown in the diagram below.
Then comes the electrical connection
Before connecting the solar array to the solar pump controller, connect a circuit breaker between them Now connect the solar pump controller. This the brain of the entire project. It regulates the current supplied to the pump.
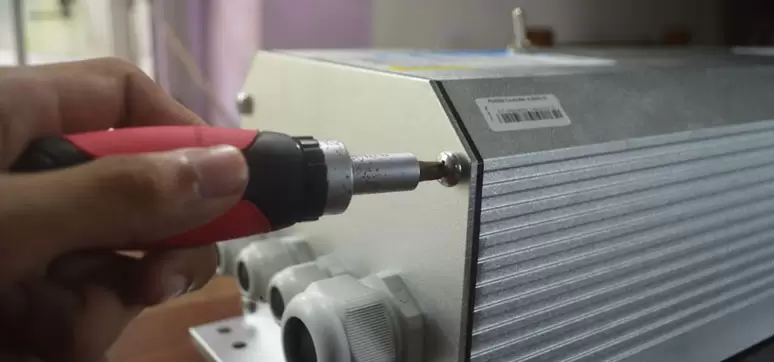
Then connect with a LED indicator from the solar panel.
Then comes the solar water pump.
Pump specifications:
i. Submersible pump
ii. 3 phase
iii. Flow rate 22m^3/hr
The pump basically uses the power supply from solar pump array in order to pump water from source. Pump connection is with four wires.
i. 3 wires each phase
ii. 1 wire ground
The motor power, motor voltage, motor current, motor speed, flow rate, efficiency etc vary for different pumps and manufacturers. Choose a pump the suits your needs.
So that was exhaustive. I hope you enjoyed reading. Maybe it leads to your entire change in career plans. Kudos!


Post A Comment